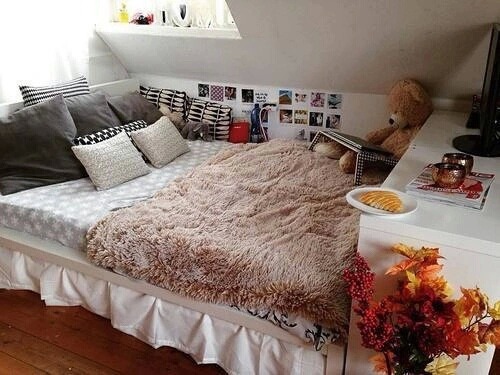
pic of the week!!

pic of the week!!
!!!

Thursday, February 18, 2016

DIY MODERN DREAMCATCHER


DIY MODERN DREAMCATCHER


diy modern dreamcatcher | almost makes perfect


diy modern dreamcatcher

MATERIALS:


01. start with your first piece of yarn by tying and knotting it on the top of your ring. (i used a piece of washi tape to keep them from sliding). use long pieces so that you can have flexibility later when trimming.
02. tie and knot the other end as tightly as you can on the bottom of your ring. you can slide your yarn around once you have all your pieces tied, so don’t worry about the placement too much. if you’re having trouble making it tight, tie it a little higher than you’re planning on having it and slide the yarn down once knotted.
03. do this as many times as you want. if you’re doing the same bead pattern, make sure you have an odd number of yarn pieces.
diy modern dreamcatcher

diy modern dreamcatcher 
04. once you’re done tying all your yarn, scrunch your top knots together as tightly as you can. trim the ends off.
05. hang your ring on a wall where you can step back and slowly trim off the bottom ends. do this slowly, so you don’t end up cutting off more than you like.
06. attach your beads, if your yarn isn’t going through your bead holes easily, use a toothpick to push it through. you can gently tie each bead on before knotting, so you can step back and make sure everything looks pretty and balanced.
07. once you’re happy with the dreamcatcher as it, tie a small additional piece of yarn to the top for hanging.
diy modern dreamcatcher  |  almost makes perfect 

diy modern dreamcatcher | almost makes perfect

credits to: http://www.almostmakesperfect.com/2015/05/20/diy-modern-dreamcatcher/ 

i really want to try this my room can do some sprucing up!  


Wednesday, February 17, 2016

EASY TO MAKE BREAKFAST SANDWICHES

EASY TO MAKE BREAKFAST SANDWICHES


*Prep Time:  10 min.  *Cook Time: 90 sec.  *Servings:  12 Breakfast Sandwiches

Ingredients:


  •   1 dozen Eggs
  • 12 English Muffins
  • 12 Slices of Cheese
  • 12 slices of Canadian Bacon
  • Salt and Pepper
To begin you will need to preheat the oven to 350 degrees.


I don’t know about you, but I love the shape of the eggs in the McMuffin sandwich.  I’ve tried MANY different ways to achieve this, but in the end, the muffin pan method beats them all!
Spray your muffin pan with cooking spray, and place a cracked egg into each compartment.  I really like these 12 muffin pans, but any muffin pan will do.
 
Next season the eggs with a little salt and pepper.
 
Place the eggs into the preheated oven and them cook for 10-15 minutes.  you want them to be solid and white.  NO JIGGLY CLEAR STUFF! 
 
While the eggs are baking you can prep the rest of the ingredients.
Halve the English Muffins.
 
Heat a griddle pan and spray with cooking spray.
Place the English Muffins face down on the pan and cook until toasted and brown.
After that, brown the Canadian bacon on both sides.
by this time the eggs should be done.
Trust me.  The are completely cooked through, even the yolks.
 
Assemble the sandwiches.
Don’t the eggs look so cute!
Put them together and wrap them individually in foil.
From this point you can eat them OR freeze them for later.
To reheat, remove the from the foil and place in the microwave for 90-100 seconds.
Easy to Make Breakfast Sandwiches


Easy to make breakfast sandwiches that can be frozen for a great breakfast everyday of the week.
Author: 
Cuisine: Breakfast
Serves: 12
Ingredients
  • 1 dozen eggs
  • 12 English Muffins
  • 12 slices of Canadian Bacon
  • 12 slices of cheese
  • Salt and Pepper
Instructions
  1. Preheat the oven to 350 degrees.
  2. Spray a muffin pan with cooking spray and place one, cracked, egg into each compartment.
  3. Place in preheated oven and bake for 10-15 minutes, until eggs are white and no longer jiggly.
  4. In a hot skillet or griddle pan, brown the halved English muffins and brown the Canadian bacon.
  5. When the eggs are finished assemble the sandwiches.
  6. Eat or wrap individually in foil and freeze.
  7. To reheat, remove from foil and cook for 90 seconds in the microwave.

credits to:http://www.madefrompinterest.net/easy-to-make-breakfast-sandwiches/ 

Monday, February 15, 2016

DIY TRIANGLE MOBILE

DIY TRIANGLE MOBILE

diy moble 

Triangle Mobile Materials

triangle mobile

– Scrapbook or other decorative paper
– Embroidery hoop (mine was 9″ in diameter)
– Paper cutter
– Scissors
– String
– Glue stick (not pictured)
– Tape (not pictured)

Step 1

triangle mobile
Pick out several pieces of scrapbook or decorative paper that you will use for your project. Try to choose pieces that have a similar color scheme to keep your finished mobile looking cohesive! I decided to go with blacks, blues and pinks, with a little bit of yellow thrown in!

Step 2

triangle mobile
Take your paper cutter and cut all your scrapbook paper pieces into equal strips. My strips were 0.75″ inches in width. Basically I just line up my paper to the edge where the metal meets the white plastic on my particular paper cutter and just went with that width. Once you’re done you’ll have a beautiful pile of strips like so: triangle mobile 

Step 3

triangle mobile
Take those strips that you cut in the previous step and cut them again so they are roughly perfect squares. Again, I just eyeballed this for measurements, but feel free to measure it out if you want it to be perfect!

Step 4

triangle mobile
More cutting! Woohoo! Take all those squares you just cut and then cut them in half on the diagonal so that you get two triangles. All this cutting is a little time-consuming, but it’s definitely easy!

Step 5

triangle mobile
Take your string and cut a bunch of different lengths – don’t feel like you have to measure anything! Just cut some short ones, some long ones, and some medium ones. I think I cut around 18 strings total. Then take your glue stick and start gluing two triangles together, with the string running through the middle. That way, no matter which way the mobile turns, all the triangles will be double-sided and look professionally finished! It’s okay if the triangles don’t line up perfectly, I think it just ads to the charm!

Step 6

triangle mobile
Once you’ve finished gluing your triangles over the string, attach the strings to the inner ring of your embroidery hoop and tape them in place. I would suggest using clear tape for this so it’s less visible, but all I had on hand was colored washi tape! You could also use little dots of hot glue, if that works better for you. After you’ve attached all the strings, tie a couple of hanging strings to the edges of the hoop so it’ll be able to hang freely! Put the outer ring of your embroidery hoop back on and tighten the screw. And you’re all finished! Here’s what my finished triangle mobile looks like:
triangle mobile  
credits to: http://www.blesserhouse.com/2015/02/diy-bohemian-chic-triangle-mobile.html#more 

and it's almost spring!!! so i know everyone will be rearranging their rooms,dorms,offices, or nurseries so i hope the diy's help and credits to: http://diyprojectsforteens.com/diy-anthropologie-hacks/ for having available diy's for everyone to use. my next diy is a easy breakfast sandwich on the go!! 

Sunday, February 14, 2016

Happy Single's Day!!

Happy Single's Day Everyone, And Happy Valentine's Day For Those Who Have A Valentine. today is the day you pig out on chocolate, get a thousand roses and relax with your spouse or children or your family. have a nice rest of your day everyone!!.    

Friday, February 12, 2016

Honey Nut Cheerios!!!

Thanks for the free box of Honey Nut Cheerios! And the Droid Viewers!!!😁 @cheerios golden dude bb-8 b-u4d i only have one my mom has bb-8 and c-3po. i also love STAR  WARS!!!!!!!!!!!!!   they are the cutest things ever!! :P and i'm eating a sandwhich!! lml idk randomness


Wednesday, February 10, 2016

Floral Quote Globe | Anthropologie Hack


 Floral Quote Globe | Anthropologie Hack

floralglobe6 copy

    MATERIALS
  • GLOBE (MINE WAS FROM WORLD MARKET) //
  •  
  • LIGHT MINT PAINT //
  •  
  • PAINT BRUSH //
  •  
  • RIFLE PAPER CO. GIFT WRAP //
  •  
  • MOD PODGE //
  •  
  • GOLD PERMANENT MARKER OR PAINT //
  •  
  • GOLD SPRAY PAINT
floralglobesteps1


1. First spray paint the entire globe gold.
2. Once the spray paint is dry, paint the globe part in the light mint color. You will want to do at least 3 coats. 
floralglobesteps2

3. Next, write your saying on the globe in the center at an angle. You might want to trace it with a pencil first to make sure the placement and spacing looks right. I just free-handed it in the best script I could manage. I chose the quote “you are my greatest adventure” from Moonrise Kingdom. The original globe has a great Shakespeare quote and really anything would work here so just choose your favorite saying. I also used a gold permanent marker instead of just gold paint because I knew that the wording would come out much better that way. I then traced it two more times to make the lines thicker.

floralglobesteps3

4. Carefully cut out some of the florals from the gift wrap.
5. Use mod podge to adhere the flowers to the globe around the quote. I just cut out different sizes of bouquets and individual flowers and played around with what combination looked best. Once they were all glued on I then did a layer of mod podge on top.


Tuesday, February 9, 2016

ANTHROPOLOGIE Knock Off Agate Coasters

agate coasters

What You Need To Make Anthropologie Knock-Off Agate Coasters:

qbF-H_VdLzZlzg73_jg2g1x6sXV_e2U38l8JGlMZGt0
*A few notes:
This project is super simple, but there are a few tips/tricks to know.  First, where to find agate slices!  I purchased my set at Hobby Lobby, but I got the impression that they were not something they normally carry or keep very many in stock.  After a lot of searching online, I found this website that sells them at a pretty great price.  If you plan on making a few sets for holiday gifts, I would definitely try this site out since you get a discount on bulk orders!

You will want your agate slices to be large enough.  Slices vary in size and are not all perfectly round.  The smallest coaster I had was 3 inches in diameter at its smallest and it was just big enough.  If you are able to find the agate in person you will be able to judge in person, but if I were to order online I would order the 3.5 – 4” size and put in a request for rounder shapes.
agate coasters

How To Make Anthropologie Knock-Off Agate Coasters:

Lay down a sheet of newspaper to work on.  
agate coasters
Shake your liquid leafing well before opening.  This can smell kind of strong, so if you are sensitive I would be sure to make sure in a well ventilated area. 


Dip your small paint brush in the liquid leafing.  A little bit will go a long way! 
Anthropologie Knock Off DIY Gilded Agate Coasters
Make small brush strokes around the outside of your agate slice.  The liquid leafing dries quickly. 
Set the agate slice on the newspaper to finish drying. 

Anthropologie Knock Off DIY Gilded Agate CoastersIf you are using rubber feet, stick a few on whichever side you deem as ‘the bottom’ spacing them out evenly.
Anthropologie Knock Off DIY Gilded Agate Coasters
  
 If you accidentally get some gold on the stone surface, just allow it to dry and then dip a Q-tip in nail polish remover and gently rub.  It should come off.  
It’s really that simple. Now you too can own a gorgeous set of Gilded Agate Coasters and feel great knowing you didn’t spend hundreds of dollars!
Anthropologie Knock Off DIY Gilded Agate Coasters

Credits to:http://totallythebomb.com/anthropologie-knock-off-diy-agate-coasters/comment-page-1#comment-241574


Saturday, February 6, 2016

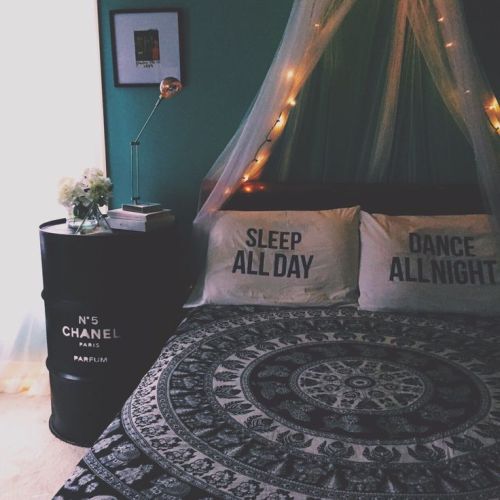
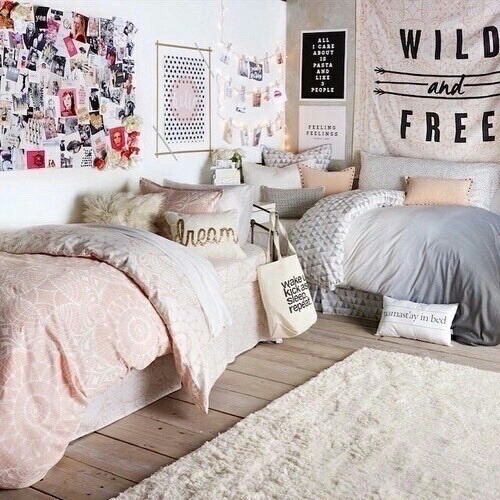
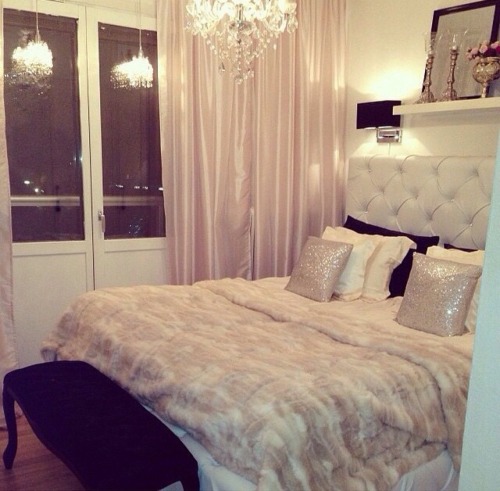
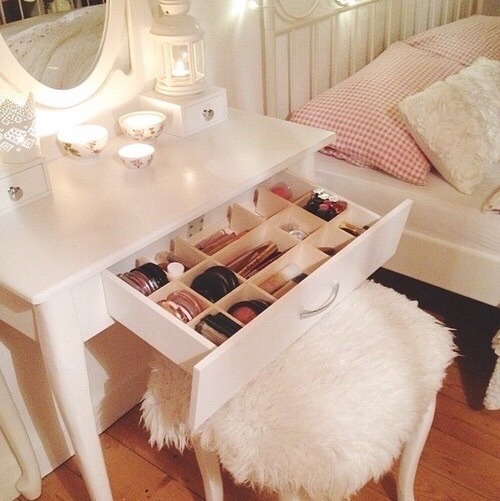
Bed Room Goals! (Tumblr Addition)

BedRoom Goals #1
*the pillow covers are amazing
* the sheets are bomb
*fairy lights <3 <3 <3


THE Wild&Free Poster is BAE!! And the two beds are
in the best position ever i just love all of it.


  • *The Record Player Is My Life <3 <3 I Love The Canopy Like Sheet And the pillows! 
  •  


  •     
  •  
     
    *the furry bed spread <3, i love the silkie pink curtains! and the golden pillow!

       
    *This is truly Vanity Goals Af!! I've always wanted a vanity.


    * the little window is sooo cute ive always wanted a tiny window like that!! 


    Well I Hope You Can Relate To This, I Hope You like it!!! I Hope You Like The Tumblr Addition!!